In Poptropica Spy Island, a new sinister menace has been discovered by Poptropica’s three top spies. But then they all disappeared and you need to come to the rescue. Your mission is to use your special spy skills to rescue your fellow agents and then discover all the clues you need to put a stop to a terrible plot from the criminal organization B.A.D. This complete walkthrough and guide will give you all the cheats and secrets you need and show you how to beat Poptropica Spy Island.

- Go to Spy Island by balloon and then go right and go into the Headquarters building.
- Leap up to the top level and soon you see a man sporting a white jacket and bow-tie. This is Director D, the head of the secret agent group. He’ll give you a Decoder Kit.
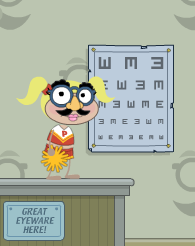
- Leave the Headquarters and run down the street to the right. Go into the Spyglass Eyewear shop.
- Go to the left and speak with the guy standing next to the vision test chart and ask him to give you an eye examination.
- When you accept the exam, choose the exact opposite symbol than what he points to. By choosing the exact opposite ones, you’re providing him the secret signal informing him you are an agent.
- He’ll walk outside and let you know to meet him upstairs.
- Go out the door then leap up on the exterior of the building. There’s a small entrance in the upper left. Go inside it.
- Talk to the eye exam dude here and he will disclose that he is the scientist for secret operations. He’ll provide you with a valuable item that he just developed: the chameleon suit. Just put this suit on and you’ll fade into the background if you are standing still.
- Leave this room and run left through Main Street. Go to the Docks.
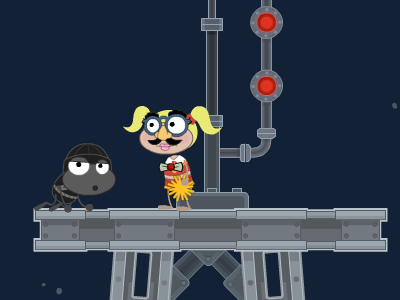
- Now that you’ve arrived at the docks, jump and run up onto the top of the roof. The way to not be spotted by the guards is to freeze in place. When you’re not moving, your chameleon suit will make you invisible and the guards cannot see you.
- Keep moving over the rooftop until you arrive at a small door, then go inside.
- Head down through the floors in this room the same way. Just stand totally still to keep the guard dogs from spotting you.
- Once you arrive in the bottom of the room on the left, you’ll be able to go down through a hole in the roof of a little room.
- You’ve just found one of the missing agents. He’s lying on the floor bound with rope. Click on him to set him free. He’ll give you a tool that you can use later in the mission. It’s a laser pen that cuts cleanly through metal objects. And before he runs away he’ll give you another item: a satellite clue card.
- Jump up and go out the way you came. When you’re back out of the room on the bottom floor, run to the right and soon you’ll find the exit.
- Go outside and you’ll return to the docks. Next return to Main Street by going to the right.
- Continue past Main Street to the right and go to Balding Avenue. Keep on running until you arrive at the B.A.D. Bistro and then go inside. If you’re still wearing your chameleon suit, it will automatically be removed when you enter. Run through the restaurant past the B.A.D. operatives at the table and go into the kitchen.
- Talk to the chef and apply for the job.
- To get the job, you’ll need to pass a test. In this test, the chef will point to different items with his spoon and you must remember the order in which he pointed to all of them. Once you finish the test, you get the job and a special chef’s hat. Put it on.
- Then go back out to the table and talk to the B.A.D. operatives. One of the agents will request that you fill his glass. He’ll give you a wine glass that has his fingerprint on it.
- Go back inside the kitchen and then climb up above the stovetop through the opening in the ceiling. Next jump one by one over the lighting fixtures to get out of the restaurant with the B.A.D. operatives seeing you leave with the wine glass. When you reach the end, drop back down and then leave the restaurant.
- Once outside, run right until you see a guy in the bushes wearing camouflage. Talk to him and he’ll give you a folder called File X. Open up your backpack and examine the file. Slide the paper back into the file so that only one row of letters can be seen. You can now read a secret message from top to bottom that says, “Don’t Trust Director D.”
- Keep on going right to Toupee Terrace. You’ll arrive a house with an alarm system. Keep jumping up the windows and side ledges while avoiding the lights that turn on because they trigger the alarm. Go all the way up ad across the house until you get to the roof. When you get to the grate at the top, click on it to use the laser pen to slice through the bars. Then go inside.
- Inside the attic you’ll find another fellow agent tied up. He’ll give you a special item: a grappling bow-tie. He’ll also give you another piece of the Satellite Clues.
- Go back outside the attic and jump down. Then head left back to Balding Avenue.
- Put on your grappling bow-tie and stand on the ledge next to the guy who gave you the file. Then click on the bow-tie icon in the lower-left corner of your screen. Aim straight up. The bow-tie will fix itself and carry you up to a sign that points to the rooftop. Click it to head up there.
- Jump up to the top of the roof and stand on the very edge over on the left. Click on the bow-tie again and aim at about a thirty degree angle to the left. The bow-tie will attach to the radio tower with red lights on it.
- Once there, aim your bow-tie out to the right at about a 20 degree angle and you should end up on another glass rooftop. There’s a metal air vent here. Click on it to go inside.
- You will find yourself inside big greenhouse. Run to the far right, where you’ll see a tree with a large cherry bomb growing on the branches. Click on the cherry bomb to make it drop. The fuse starts, so get going and push it to the left onto the top of the plant nearby.
- This is a spring plant and it will shoot the cherry up onto the platform above. Use your bow-tie to jump up there as well.
- Push the cherry bomb again to the left until it drops down. Then push it on the next plant and follow it up.
- Now push it in front of the door to a cage where another fellow agent is being held captive. Wait for the bomb to explode and destroy the door then click on the agent inside. She’ll give you another cool piece of equipment, the ultra vision goggles. She’ll also give you the remaining piece of the satellite clues.
- Put on the ultra vision goggles and then drop down to the left and exit the greenhouse. Jump down and off to the right until you land on the ground in Balding Avenue. Head right again to Toupee Terrace and run past the house with the security alarms.
- Go all the way to the right through a hole in a fence with a sign saying that it’s the B.A.D. control center.
- This area has a series of lasers that you need to avoid by timing your moves across. First go all the way to the right and then go up the slanted side of the building. You’ll get to a moving platform, jump on it and then go to the left onto another platform that goes from left to right.
- Jump again to another up/down platform on the left and then up to the platform above. There’s a door there with a fingerprint scanner. Since you have the wine glass with the fingerprint on it, you’ll use that to sneak inside.
- Jump up while avoiding the lasers until you get to a platform with computers. Suddenly, you’ll find that you’re trapped inside a cage.
- Fortunately, Director D appears and saves you. He’ll then ask you to get the teleporter working.
- Use the satellite clues and put each clue on top of each other to reveal the code, LASER HAIR REMOVAL. Next enter those three words in sequence into the computer. The teleporter will turn on and then Director D will step inside. Follow him through the teleporter.
- Director D reveals that he’s the criminal mastermind of the B.A.D. organization. The traitor!
- He’s got control of his satellite back and plans to vaporize the hair off everyone in Poptropica. He’ll step inside his rocket and then some mini-bot robots will appear out of the wall.
- What you need to do here is to maneuver the mini-bots into the gold power spheres spread about the room. Each time, you need to get yourself on the opposite side of the sphere from the mini-bot so that it will smash into it when it comes after you.
- After you have destroyed the mini-bots, Director D comes after you. Try to get him to smash his ship into the ceiling several times while you avoid him.
- As soon as Director D smashes up his ship, he’ll surrender and be put in prison.

Now you’ll get the island medallion for completing Spy Island. Great job, super-spy!
